[ad_1]
Learn this fast information to learn to transfer a VM from its present folder to a brand new folder in Hyper-V.
Step 1: Prep the Vacation spot Folder
While you create VMs, to maintain it organized, it’s best observe to have a folder to retailer VM information. Moreover, it’s a nice concept to have a folder for every VM.
In case you create VMs utilizing Hyper-V Supervisor, the method creates a folder for every VM. So, you don’t want to manually create a folder for every VM.
Earlier than you progress the VM, create a folder with the VM’s identify within the vacation spot folder. In my instance, I need to transfer a VM to drive D.
So, I created a folder known as VMs. Then, I created a folder with the identify of the VM.

Step 2: Transfer the VM to the New Folder
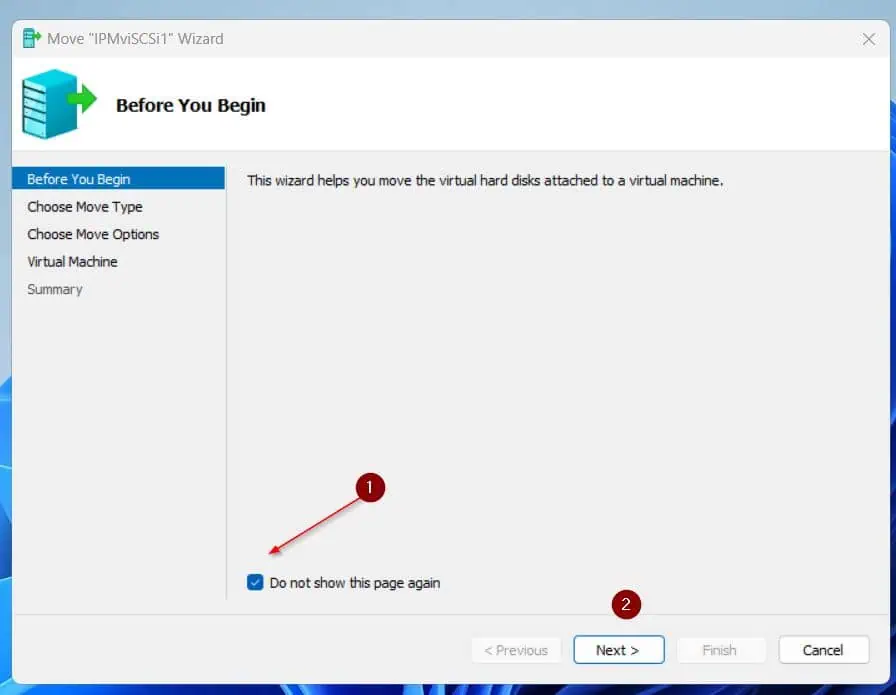
- Open Hyper-V Supervisor, right-click the VM you need to transfer, and choose Transfer.

- Then, on the primary web page of the wizard, click on Subsequent.
To buy Hyper-V Supervisor displaying this primary web page subsequent time, examine the “Don’t present this web page once more” checkbox.
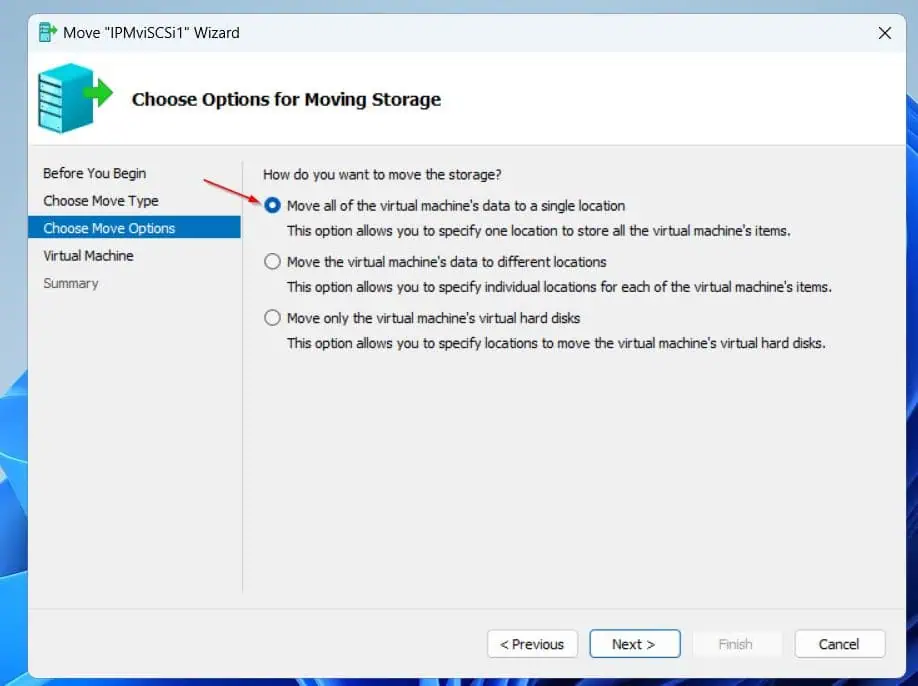
- On the “What sort of transfer do you need to carry out” web page, choose “Transfer the digital machine’s retailer.”

- Choose the primary choice right here. This feature lets you specify a folder to maneuver the VM. Then, the wizard creates sub-folders as required – extra on this later.
- After that, enter the trail to the VM’s folder you created in step 1. Use the Browser button to navigate to the folder and choose it.

- On the ultimate web page, assessment the place the wizard will retailer the VM’s information, and if you happen to’re pleased with it, click on End.
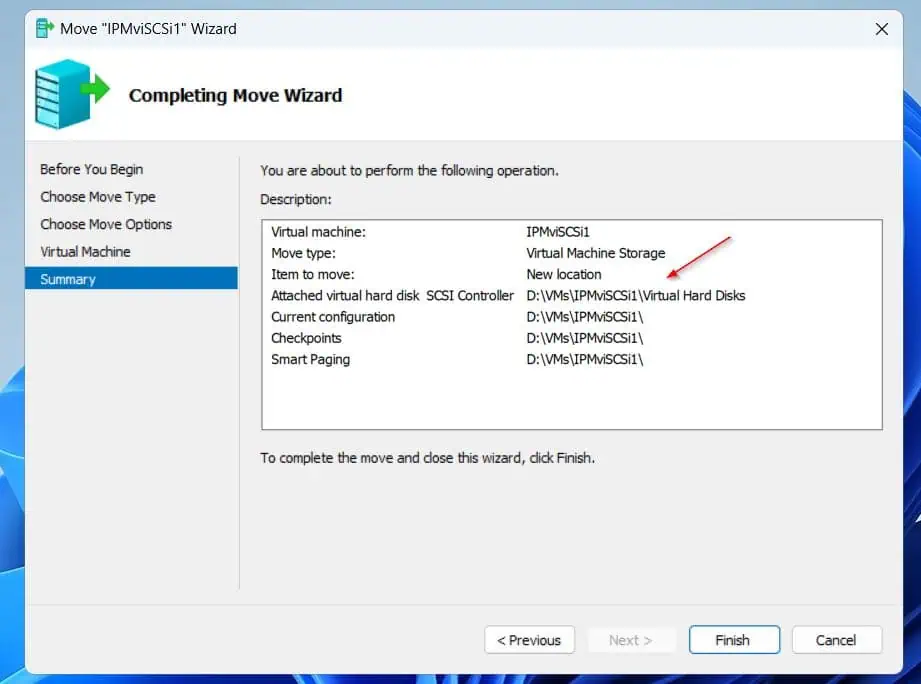
The wizard will create subfolders within the VM’s folder. See my screenshot under.

Step 3: Change the Default VM Path in Hyper-V Settings
In Hyper-V Supervisor, you may outline the place new VMs are saved. After shifting current VMs to the brand new location, it could be a fantastic concept to set the brand new folder as Hyper-V’s default.
Listed below are the steps:
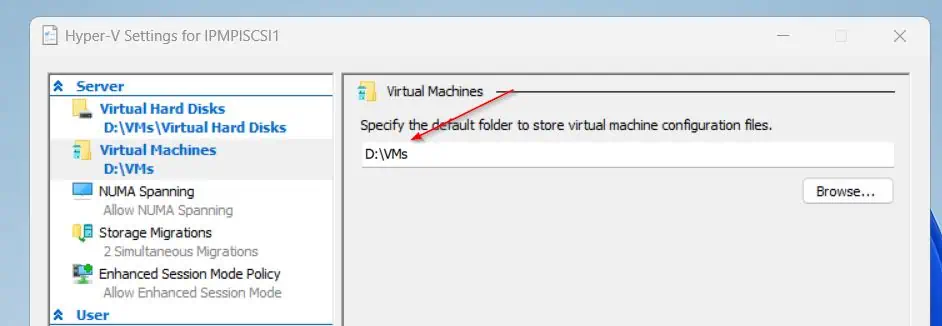
- On the Actions pane of the Hyper-V Supervisor console, click on Hyper-V Settings.

- Below the Server part, the Digital Exhausting Disk location is chosen by default. Change the folder path (earlier than Digital Exhausting Disks) to the bottom folder you need to retailer VMs.
By default, Hyper-V shops VM HDDs in “C:ProgramDataMicrosoftWindowsVirtual Exhausting Disks.” Change “C:ProgramDataMicrosoftWindows” with the brand new folder path


- After that, click on Digital Machines, then, exchange the trail with the brand new folder path. While you end making the adjustments, click on OK to avoid wasting them and shut the Hyper-V Settings.


Conclusion
Transferring VMs in Hyper-V is a typical admin process and on this information, I mentioned the steps to finish this. Moreover, I confirmed how you can change the default path Hyper-V shops new VMs and their laborious disks.
Thanks for stopping by. Earlier than you run, let me know your ideas about this information by responding to our “Was this web page useful?” under.
[ad_2]